GridView là một trong những control rất quan trọng khi thiết kế web và lập trình ASP.NET. Control này cho phép lập trình viên dễ dàng hiển thị dữ liệu và các thông tin quan trọng theo dạng bảng gần giống với ứng dụng văn phòng quen thuộc Microsoft Excel.
Trong bài viết này, Hanoi-Aptech sẽ hướng dẫn bạn những thao tác đơn giản và nhanh chóng nhất để có thể làm chủ GridView chỉ với một vài dòng code.
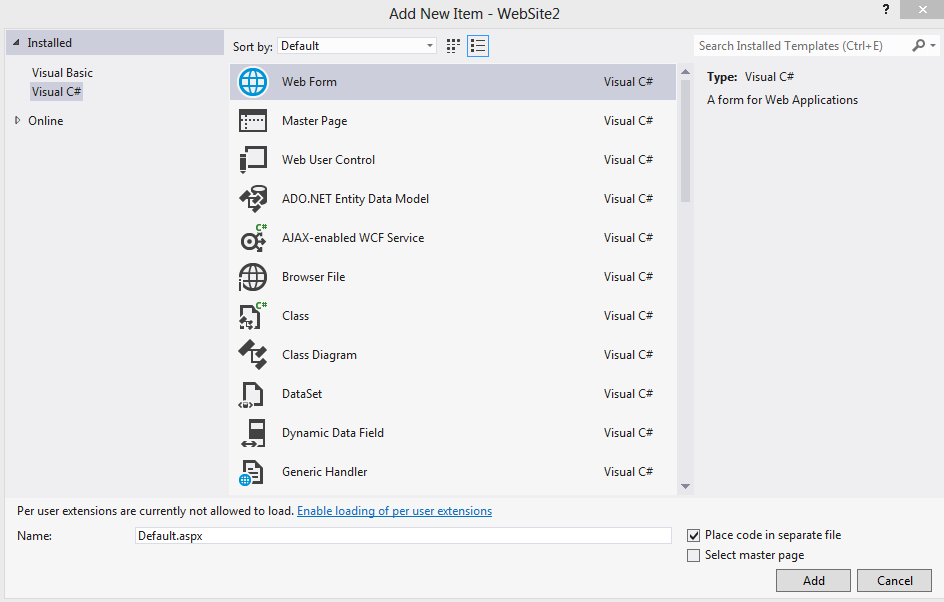
Bước 1: Mở Visual Studio, tạo một website mới với mẫu “ASP.NET Empty Website”
Bước 2: Tạo một trang web mới với tên “Default.aspx”
Bước 3: Thiết kế giao diện trang Default.aspx
Mở trang Default.aspx, chọn Source rồi thay thế code hiện tại với đoạn mã dưới đây.
<%@ Page Language="C#" AutoEventWireup="true" CodeFile="Default.aspx.cs" Inherits="_Default" %>

<!DOCTYPE html>

<html xmlns="http://www.w3.org/1999/xhtml">
<head runat="server">
    <title></title>
    <style>
        td {
            margin:5px;
            padding:5px;
            font-family: Tahoma;
            font-size:12px;
            text-align:left;
            vertical-align:top;
        }
    </style>
</head>
<body>
    <form id="form1" runat="server">
    <div>

        <h1>Hướng dẫn sử dụng control GridView</h1>
        <br />
        <asp:GridView ID="GridView1" runat="server" Width="100%" CellPadding="4" ForeColor="#333333" GridLines="None">
            <AlternatingRowStyle BackColor="White" />
            <EditRowStyle BackColor="#2461BF" />
            <FooterStyle BackColor="#507CD1" Font-Bold="True" ForeColor="White" />
            <HeaderStyle BackColor="#507CD1" Font-Bold="True" ForeColor="White" HorizontalAlign="Left" />
            <PagerStyle BackColor="#2461BF" ForeColor="White" HorizontalAlign="Center" />
            <RowStyle BackColor="#EFF3FB" />
            <SelectedRowStyle BackColor="#D1DDF1" Font-Bold="True" ForeColor="#333333" />
            <SortedAscendingCellStyle BackColor="#F5F7FB" />
            <SortedAscendingHeaderStyle BackColor="#6D95E1" />
            <SortedDescendingCellStyle BackColor="#E9EBEF" />
            <SortedDescendingHeaderStyle BackColor="#4870BE" />
        </asp:GridView>
        <br />

    </div>
    </form>
</body>
</html>
Bước 4: Thiết lập các thuộc tính và các cột dữ liệu của GridView
Mở lại giao diện Design. Lúc này bạn sẽ có hai lựa chọn:
1. Tự động hiển thị tất cả các trường trong nguồn dữ liệu (nguồn dữ liệu thường là DataTable với dữ liệu được lấy từ CSDL).
2. Tùy chọn các cột hiện thị (phần này sẽ được hướng dẫn trong bài nâng cao).
Bước 5: Kết nối cơ sở dữ liệu và hiển thị lên GridView
Để kết nối CSDL và lấy dữ liệu về, bạn cần sử dụng lớp SqlDataAdpater và DataSet trong thư viện System.Data.SqlClient và System.Data
Mở tệp Default.aspx.cs và nhập đoạn code sau:
string CONN_STR = @"Data Source=.;Initial Catalog=LaptopSystem;User ID=sa;pwd=;";
    protected void Page_Load(object sender, EventArgs e)
    {
        if (!IsPostBack)
        {
            SqlDataAdapter da = new SqlDataAdapter("SELECT * FROM Laptop", CONN_STR);
            DataSet ds = new DataSet();
            da.Fill(ds,"Laptop");
            GridView1.DataSource = ds.Tables["Laptop"];
            GridView1.DataBind();
        }
    }
Chú ý: CONN_STR là thông tin kết nối đến CSDL của bạn.
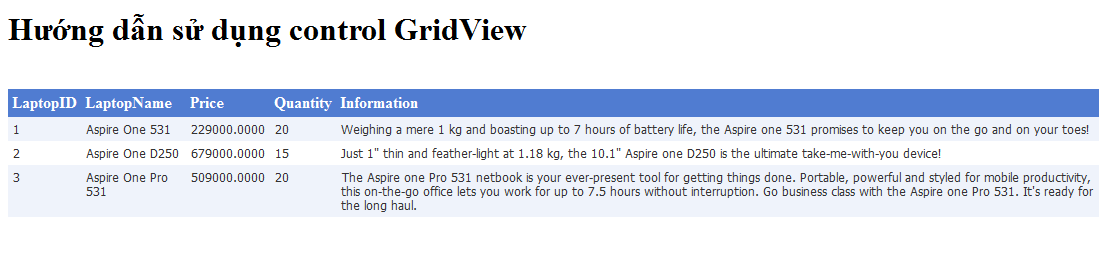
Bước 6: Chạy thử
Lúc này trang web của bạn sẽ có giao diện giống hình sau:
Nâng cao các tính năng: Select, Delete và Edit
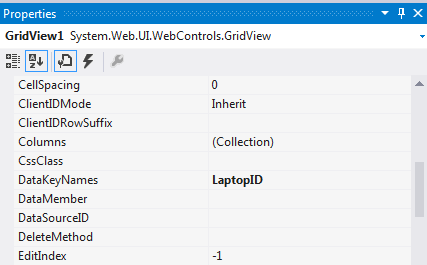
1. Thiết lập khóa chính với property: DataKeyNames
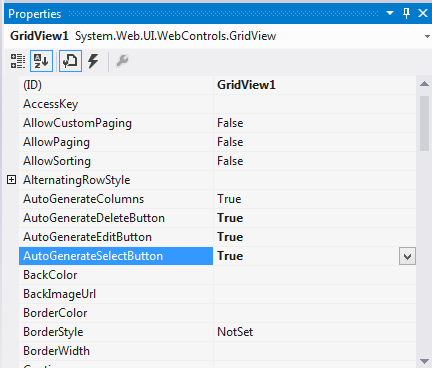
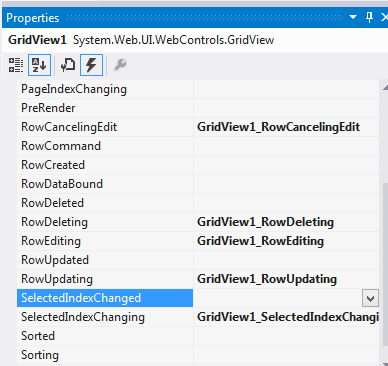
2. Mở chức năng Select, Delete và Edit
3. Xử lý sự kiện GridView (trang Default.aspx)
4. Viết code cho các sự kiện trên (trang Default.aspx.cs)
using System;
using System.Collections.Generic;
using System.Data;
using System.Data.SqlClient;
using System.Linq;
using System.Web;
using System.Web.UI;
using System.Web.UI.WebControls;

public partial class _Default : System.Web.UI.Page
{

    string CONN_STR = @"Data Source=.;Initial Catalog=LaptopSystem;User ID=sa;";
    protected void Page_Load(object sender, EventArgs e)
    {
        if (!IsPostBack)
        {
            LoadData();
        }
    }

    private void LoadData()
    {
        SqlDataAdapter da = new SqlDataAdapter("SELECT * FROM Laptop", CONN_STR);
        DataSet ds = new DataSet();
        da.Fill(ds, "Laptop");
        GridView1.DataSource = ds.Tables["Laptop"];
        GridView1.DataBind();
    }
    protected void GridView1_SelectedIndexChanging(object sender, GridViewSelectEventArgs e)
    {
        string datakey = GridView1.DataKeys[e.NewSelectedIndex].Value.ToString();
        Response.Write("Bạn vừa chọn sản phẩm có mã :" + datakey);
    }
    protected void GridView1_RowDeleting(object sender, GridViewDeleteEventArgs e)
    {
        string datakey = GridView1.DataKeys[e.RowIndex].Value.ToString();
        //Viết lệnh delete dữ liệu rồi gọi lại phương thức LoadData() để nạp lại dữ liệu mới trên GridView

    }
    protected void GridView1_RowEditing(object sender, GridViewEditEventArgs e)
    {
        GridView1.EditIndex = e.NewEditIndex;
        LoadData();

    }
    protected void GridView1_RowUpdating(object sender, GridViewUpdateEventArgs e)
    {
        TextBox txtName = GridView1.Rows[e.RowIndex].Cells[2].Controls[0] as TextBox;
        //Các trường tiếp theo bạn làm tương tự như LaptopName nhưng nhớ thay đổi vị trí Cells[i] cho
        //phù hợp.
        //Trong đó Rows[e.RowIndex] trả về dòng đang sửa
        //Cells[2] là cột thứ 3 - Cột LaptopName(index đi từ 0 )
        //Controls[0] là control textbox đầu tiên trong cells [2] của dòng đang sửa
        string datakey = GridView1.DataKeys[e.RowIndex].Value.ToString();
        Response.Write("LaptopName mới: "+txtName.Text+" của sản phẩm có mã là: "+datakey);


    }
    protected void GridView1_RowCancelingEdit(object sender, GridViewCancelEditEventArgs e)
    {
        GridView1.EditIndex = -1;
        LoadData();
    }
}
Để tải mã nguồn các bạn có thể tải tại đây.
Chúc các bạn thành công !
Dương Linh
